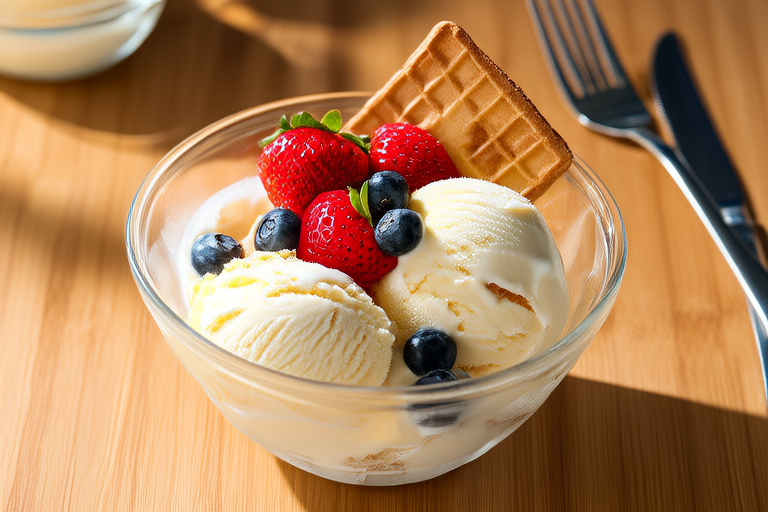
Dreamy No-Churn Vanilla Bean Ice Cream
Welcome to my blog, where we dive into the world of culinary delights and explore the art of creating exquisite dishes in your own kitchen. Today, we’re tackling a classic dessert that has been a favorite for generations: vanilla bean ice cream. But there’s a twist – this isn’t just any ice cream; it’s a dreamy no-churn version that will have you marveling at its simplicity and elegance. Let’s get started on crafting this creamy, velvety treat that will satisfy your sweet tooth without the need for an ice cream maker.
Introduction to No-Churn Ice Cream
No-churn ice cream is a revelation for those who love the rich, creamy texture of homemade ice cream but lack the time or equipment required for traditional methods. The process involves whipping heavy cream until it forms stiff peaks, then folding in sweetened condensed milk and vanilla extract (or vanilla bean paste). This mixture is then frozen until firm, resulting in a light, airy, and incredibly smooth ice cream. The best part? You don’t need an ice cream maker, making it accessible to everyone.
The Magic of Vanilla Bean
The heart of this recipe lies in the vanilla bean. While vanilla extract can be used, nothing beats the subtle complexity and depth of flavor that comes from using real vanilla beans. The tiny black specks of vanilla seeds scattered throughout the ice cream add not only visual appeal but also a burst of authentic vanilla flavor with each bite. If you’re new to using vanilla beans, don’t worry; it’s easier than you might think. Simply split the bean lengthwise and scrape out the seeds using the back of a knife.
Ingredients
- Vanilla Beans: 2-3 pods, depending on their size
- Heavy Cream: 4 cups
- Sweetened Condensed Milk: 14 oz (one can)
- Vanilla Extract: 1 teaspoon (optional, if using vanilla bean paste)
- Sugar: 2/3 cup (if you prefer a sweeter ice cream)
- Pinch of Salt: To enhance the flavors
Step-by-Step Guide
- Prepare the Vanilla: Begin by preparing the vanilla beans. Split them lengthwise and scrape out the seeds using the back of a knife. Set the seeds aside and place the pods in a small saucepan with the heavy cream. Heat the mixture over medium heat until it just begins to simmer. Remove from heat and let steep for about 15 minutes. Strain the cream through a fine-mesh sieve, pressing down on the vanilla pods to extract as much flavor as possible.
- Cool the Cream: Allow the infused cream to cool completely before proceeding. This step ensures that when you whip the cream, it will hold its shape better.
- Whip the Cream: In a large bowl, use an electric mixer to whip the cooled vanilla-infused cream until stiff peaks form. Be careful not to overwhip, as this can make the mixture too dry and grainy.
- Mix in Sweetened Condensed Milk: Once the cream is whipped, gently fold in the sweetened condensed milk and vanilla extract (if using). If you’re using vanilla bean paste, you can skip the vanilla extract. Fold in the vanilla seeds as well.
- Add Optional Sugar: If you prefer a sweeter ice cream, now is the time to add the sugar. Mix thoroughly to ensure even distribution.
- Freeze: Pour the mixture into a freezer-safe container and freeze for at least 6 hours or overnight. For the best results, let it sit at room temperature for 10-15 minutes before scooping to achieve the perfect scoopable consistency.
Tips and Tricks
Creating the perfect no-churn vanilla bean ice cream requires attention to detail. Here are some tips to ensure your ice cream turns out dreamy:
- Use Fresh Ingredients: Fresh vanilla beans and high-quality heavy cream will elevate the flavor of your ice cream.
- Don’t Overwhip: Overwhipping the cream can lead to a grainy texture. Stop whipping as soon as stiff peaks form.
- Chill Your Bowl: Chilling your mixing bowl and beaters before whipping the cream helps it whip faster and more efficiently.
- Flavor Enhancements: Feel free to add other flavors like chocolate chips, nuts, or fruit purees for a twist on the classic vanilla.
Variations and Pairings
While this recipe focuses on classic vanilla bean ice cream, there are countless ways to customize it:
- Chocolate Swirl: Add a layer of melted chocolate or cocoa powder for a decadent swirl.
- Fruit Toppings: Serve with fresh berries, caramel sauce, or a drizzle of honey.
- Nutty Delight: Stir in chopped nuts like almonds, walnuts, or pecans for added crunch.
- Cookie Crumbles: Incorporate crushed cookies like Oreos or graham crackers for a delightful contrast.
Conclusion
There you have it – a simple yet sophisticated no-churn vanilla bean ice cream that rivals any store-bought version. With just a few ingredients and minimal effort, you can create a dessert that will impress your guests and satisfy your cravings. Whether enjoyed on its own or paired with your favorite toppings, this ice cream is sure to become a staple in your repertoire. Happy cooking, and enjoy every creamy, dreamy spoonful!


