Homemade Pizza Night: Customize Your Own Crust
Welcome to your ultimate guide on how to make the perfect homemade pizza crust. Whether you’re a seasoned pizza maker or just starting out, this article will walk you through the process of creating a delicious, customizable pizza crust that suits your taste and dietary preferences.
The Importance of a Great Crust
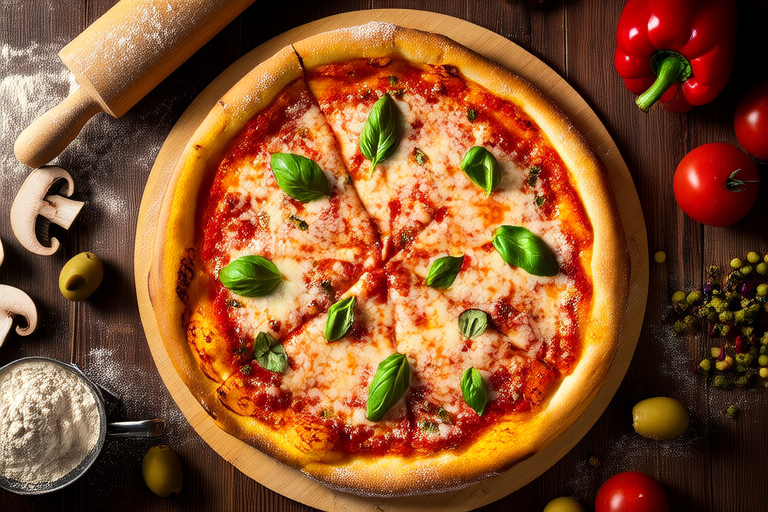
The foundation of any great pizza is its crust. It’s the first thing your guests will notice, and it sets the stage for all the toppings you plan to add. A good crust should be crispy on the outside, soft and chewy on the inside, and have a slightly golden color. Achieving this perfect balance requires attention to detail and a bit of practice.
There are many types of pizza crusts, from thin and crispy to thick and fluffy. The type of crust you choose can depend on personal preference, dietary restrictions, or even the type of toppings you plan to use. In this guide, we’ll explore different methods for making various types of pizza crusts so that you can customize your own.
Ingredients for a Basic Pizza Dough
To start, let’s look at the ingredients needed for a basic pizza dough. You’ll need:
- Flour: All-purpose flour is commonly used, but you can also experiment with bread flour or whole wheat flour for added texture.
- Yeast: Active dry yeast is essential for giving your dough its rise. Make sure it’s fresh and stored properly.
- Salt: Salt enhances the flavor of the dough and helps control the yeast’s activity.
- Sugar: A small amount of sugar helps the yeast activate more quickly.
- Olive oil: Olive oil adds moisture and flavor to the dough.
- Water: Warm water is crucial for activating the yeast.
These basic ingredients form the backbone of most pizza dough recipes. However, feel free to adjust the quantities based on your specific needs or preferences.
Making the Perfect Pizza Dough
Now that you have your ingredients ready, it’s time to mix them together. Here’s a step-by-step guide to making the perfect pizza dough:
- Activate the Yeast: In a small bowl, combine warm water (about 110°F or 43°C) with sugar and yeast. Let it sit for about 10 minutes until it becomes frothy.
- Mix the Dry Ingredients: In a large mixing bowl, combine flour and salt. Mix well.
- Add Wet Ingredients: Once the yeast mixture is frothy, add it along with olive oil to the dry ingredients. Stir until a shaggy dough forms.
- Knead the Dough: Transfer the dough to a lightly floured surface and knead for about 8-10 minutes until smooth and elastic. Alternatively, you can use a stand mixer with a dough hook attachment.
- First Rise: Place the kneaded dough in a greased bowl, cover it with a damp cloth, and let it rise in a warm place for about 1 hour or until doubled in size.
- Shape the Dough: After the first rise, punch down the dough to release air bubbles. Divide it into portions depending on the number of pizzas you want to make. Roll each portion into a ball and let it rest for 10 minutes before shaping it into your desired crust shape.
- Second Rise: Allow the shaped dough to rise again for another 30 minutes. This step is optional but recommended for extra fluffy crusts.
By following these steps, you’ll end up with a perfectly risen, pliable dough ready for customization.
Customizing Your Crust
One of the best things about making homemade pizza is the ability to customize your crust. Below are some ideas for different types of crusts you can try:
Thin and Crispy Crust
If you prefer a thin, crispy crust, you can adjust the hydration level by adding less water than usual. This results in a drier dough that bakes up crispier. Additionally, pre-baking the crust for a few minutes before adding toppings can help achieve an extra-crispy base.
Thick and Fluffy Crust
For those who love a thick, pillowy crust, increasing the hydration level and using bread flour can help create a softer, airier texture. Adding a bit of honey or malt syrup to the dough can also enhance its flavor and give it a slight sweetness.
Gluten-Free Crust
If you or someone you’re cooking for has gluten sensitivities, there are plenty of gluten-free flour options available. Almond flour, rice flour, and chickpea flour are popular choices. Be mindful that gluten-free doughs tend to behave differently, so you may need to experiment with rising times and baking temperatures.
Toppings and Sauces
Once you’ve perfected your crust, it’s time to think about what to put on top. The possibilities are endless, but here are some classic and creative topping ideas:
Classic Toppings
Start with a simple tomato sauce made from crushed tomatoes, garlic, and herbs. For cheese, mozzarella is a must, but you can also add other cheeses like parmesan or gorgonzola for extra flavor. Traditional toppings include pepperoni, sausage, mushrooms, onions, and bell peppers.
Creative Toppings
Feel free to get creative with your toppings! Try adding unexpected ingredients like arugula, prosciutto, or even fruit like pineapple or figs. For a gourmet touch, consider using truffle oil or smoked paprika.
Baking Tips
When it comes to baking your pizza, there are a few tips to keep in mind:
- Preheat Your Oven: Ensure your oven is fully preheated to the highest temperature possible, ideally around 500°F (260°C). This helps achieve that perfect char on the crust.
- Bake on a Stone or Steel: Using a pizza stone or baking steel can help distribute heat evenly and promote better browning.
- Use a Pizza Peel: A pizza peel makes transferring your pizza from counter to oven much easier. Dust it lightly with cornmeal or flour to prevent sticking.
- Monitor Baking Time: Check your pizza after about 10-12 minutes. The crust should be golden brown, and the cheese should be bubbly and slightly browned.
Conclusion
Hosting a homemade pizza night is a fun and interactive way to enjoy delicious food with friends and family. By mastering the art of making a perfect pizza crust and customizing it to suit your preferences, you can create memorable dining experiences. Don’t be afraid to experiment with different flavors and techniques to find what works best for you. Happy baking!


